How to make coffee in a moka pot? A practical guide to help you brew the perfect stovetop coffee!
The moka pot is one of the most iconic tools for brewing coffee – simple, reliable and capable of producing an intense, aromatic cup. In this step‑by‑step guide we’ll show you how to brew perfect coffee in a moka pot, how a stovetop coffee maker works, how to use a moka pot correctly, and how to avoid the most common mistakes that affect flavour.
This guide is designed both for beginners taking their first steps into Italian‑style coffee and for those who want to refine their technique and get the most flavour out of their beans. If you’re looking for a durable, high‑quality stovetop espresso maker, you’ll find them in our shop in the “Coffee makers” category.
Summary:
- What is a moka pot? How does a moka pot work?
- How to choose the right coffee for a moka pot
- Brewing coffee in a moka pot – step by step
- The most common mistakes when brewing coffee in a moka pot
- How to care for your moka pot
- The key rules for brewing great moka pot coffee
What is a moka pot? How does a moka pot work?
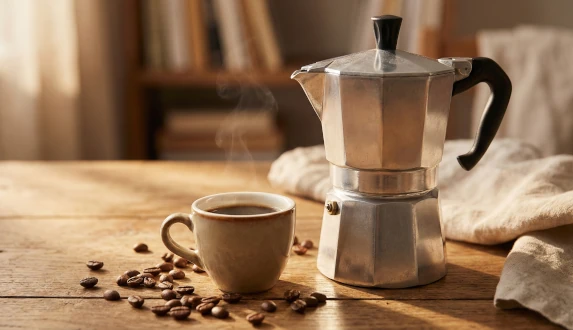
The moka pot (also known as a macchinetta or moka) is a type of pressure‑based stovetop coffee maker. Although it doesn’t generate as much pressure as a traditional espresso machine, it produces an intense, full‑bodied brew – the classic coffee from a moka pot. Understanding how a moka pot works helps you achieve consistent results and extract the best flavours from your beans.
Many beginners choosing their first coffee moka pot ask: how to use a moka pot properly to achieve the best flavour? The key lies in understanding the basic mechanism and following a few simple rules, which we explain in the next sections.
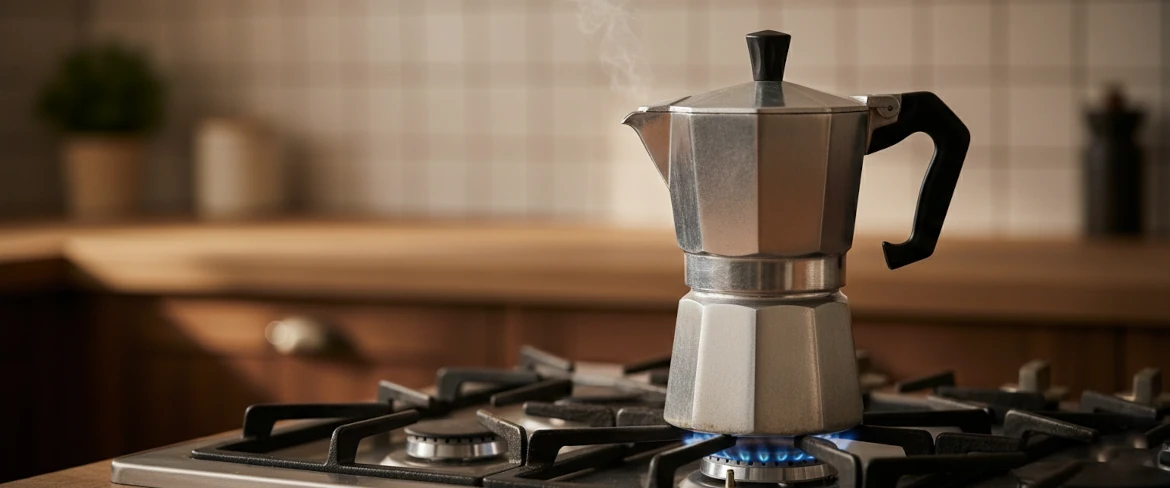
During brewing coffee in a moka pot, steam plays a crucial role. Water in the lower chamber heats up and turns into steam, increasing pressure and pushing water up through the coffee basket and into the upper chamber. This simple yet clever mechanism is what gives moka pot coffee its signature intensity.
The history and origins of the moka pot
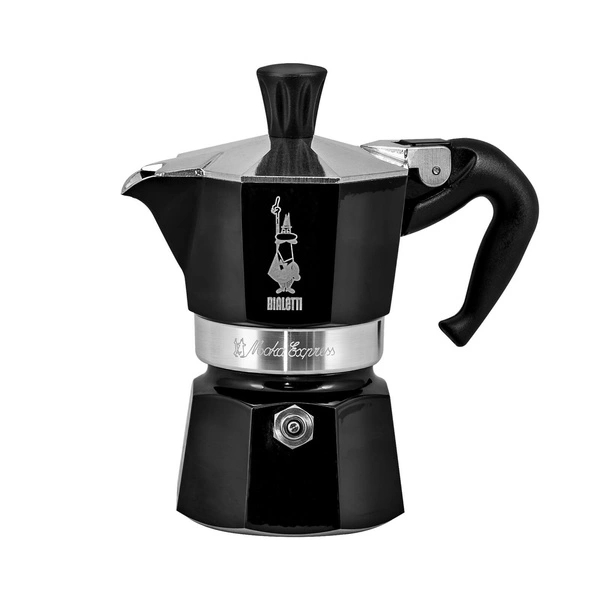
The first moka pot was patented in Italy in 1933 by Alfonso Bialetti. His design, the Moka Express, soon became an icon of Italian coffee culture – used everywhere from small cafés to family kitchens where days began with the familiar gurgling of a stovetop espresso maker.
Although Bialetti gave the moka pot its famous shape, the idea of brewing coffee using steam pressure is much older. As early as the 19th century, inventors created various devices based on a similar principle – from large industrial machines to portable home models. However, it was Italian design and smart engineering that made the moka pot accessible to everyone, allowing people to enjoy “espresso‑style” coffee without leaving home.
After the Second World War, production was taken over by Alfonso’s son, Renato Bialetti. He gave the moka pot its character and global popularity – introducing the famous “little man with a moustache”, investing in marketing campaigns and making the Moka Express a staple in nearly every Italian household. Since then, the moka pot has become not just a brewing tool, but a symbol of everyday ritual and one of the most recognisable pieces of Italian design.
👉 You can buy the iconic Bialetti Moka Express 1‑cup in our shop.
💡 Fun fact: At the peak of its popularity, more than 200,000 Bialetti moka pots were sold every single day! Its simplicity and durability made it one of the most widely used stovetop espresso makers in the world.
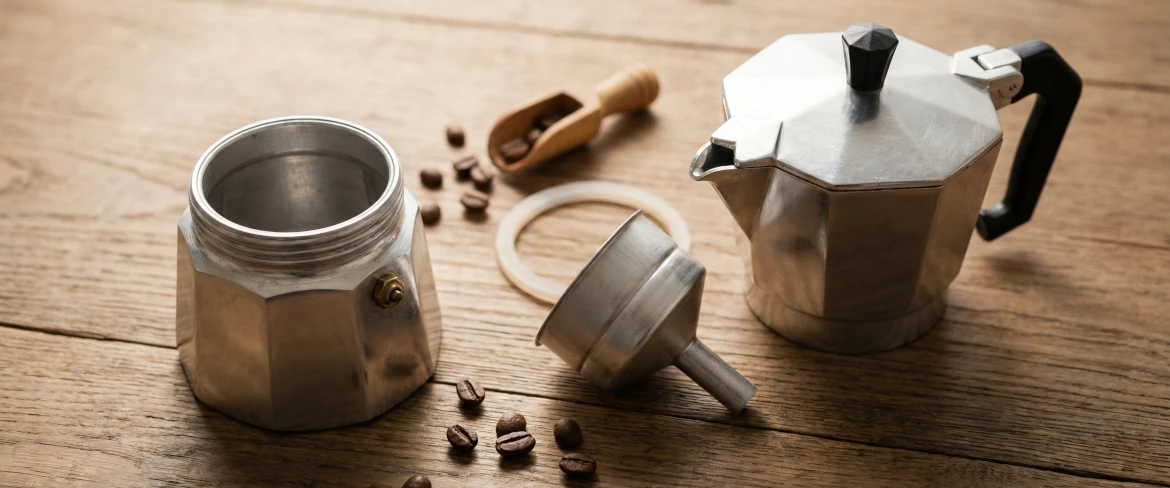
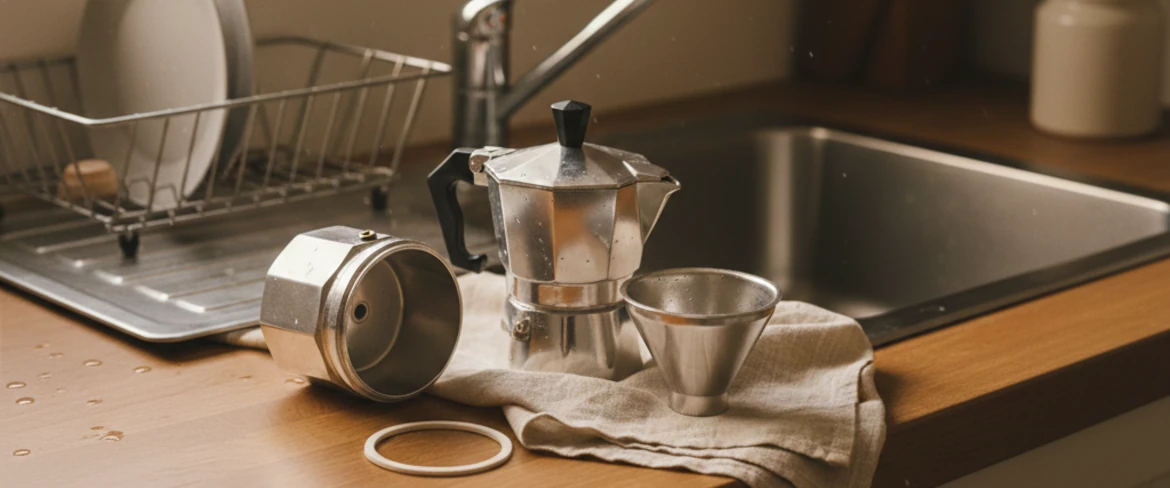
The structure of a moka pot – three essential parts
Before learning how to brew coffee in a moka pot, it’s helpful to understand its construction. Every classic stovetop espresso maker consists of three main components:
- ✔️ Lower chamber – where water heats and turns into steam.
- ✔️ Coffee basket – where freshly ground coffee sits as water passes through.
- ✔️ Upper chamber – where the finished coffee collects.
The cooperation of these three parts is what allows even a small moka pot to brew an intense, concentrated coffee. If you’re just building your home coffee setup, pay attention to the quality of gaskets and the material your stovetop coffee maker is made from.
How to choose the right coffee for a moka pot
A good moka pot is only half the success. Just as important is choosing the right coffee beans – they determine whether your coffee from a moka pot will be aromatic and balanced, or too bitter or flat. In this section, we’ll look at which beans work best, how grind size affects the brewing process, and why freshness matters so much.
If you’re looking for high‑quality beans perfect for your stovetop espresso maker, take a look at the “Coffee” category in our shop – you’ll find both blends suitable for pressure methods and single origins with distinctive flavour profiles.
Which coffee beans work best for brewing coffee in a moka pot?
The moka pot is a method that brings out intensity and depth from the beans. For this reason, medium or medium‑dark roast coffees work best – they are naturally sweeter, fuller and more balanced. Very light roasts may produce too much acidity in a moka pot, while very dark roasts can result in bitterness.
When it comes to bean type, you can choose based on your flavour preferences:
- ✔️ Arabica – ideal for those who appreciate elegant sweetness, gentle acidity and fruity or floral notes. This is the most common choice for moka pots.
- ✔️ Robusta – offers a stronger, earthier, more chocolatey flavour and higher caffeine content.
- ✔️ Arabica–robusta blends – great if you enjoy a flavour profile similar to traditional Italian espresso: intense, strong and with a thick mouthfeel.
We recommend starting with two very different flavour styles to see which suits your coffee moka pot best: chocolate‑and‑nut profiles, and more fruity coffees for those who enjoy higher acidity.
Grind size and brewing – why does it matter?
The right grind size is one of the most important factors in how to brew coffee in a moka pot successfully. If the coffee is ground too fine, it will restrict water flow and result in over‑extraction and bitterness. If it’s too coarse, water will pass through too easily, producing a weak and watery brew.
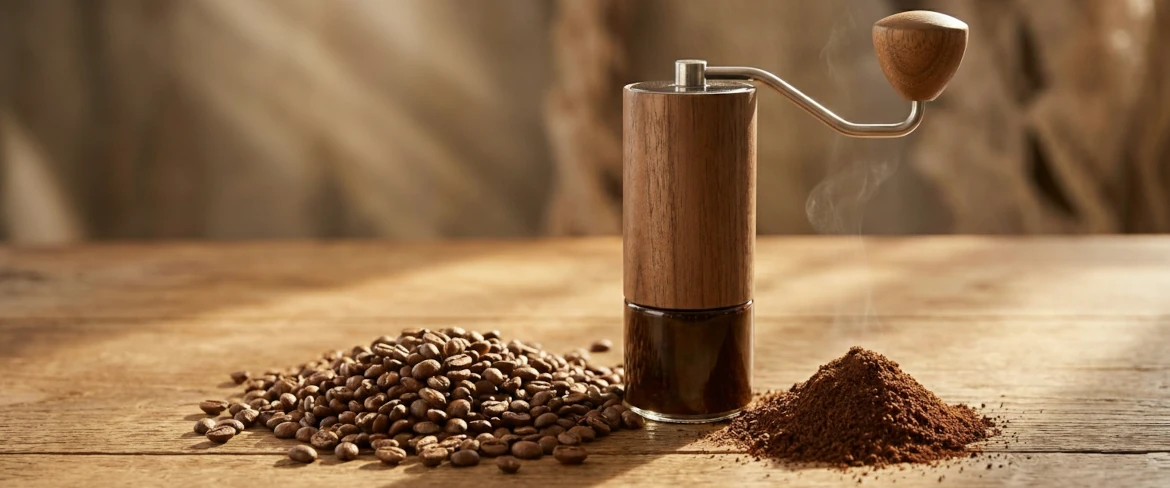
The optimal grind size for a moka pot lies between espresso and drip – fine, but not powdery, and always even in texture. The best results are achieved using a burr grinder. For a detailed overview, see our guide: “Grinding coffee – why do freshly ground beans change the coffee taste?”.
💡 Tip: If you hear intense hissing right at the beginning of brewing or the coffee gushes out too fast, the grind is probably too coarse. If the process drags on and the coffee struggles to appear, the grind is too fine.
Freshness of coffee and its impact on flavour
Even the best beans and perfect grind won’t help if the coffee isn’t fresh. Coffee loses aroma each day after opening, and the most delicate notes – such as fruit, florals or caramel – fade first. For the best results in a stovetop coffee maker, always choose freshly roasted and freshly ground beans.
How long does coffee stay fresh after opening? Ideally, it should be consumed within 2–4 weeks, provided it is stored in a cool, dry place in an airtight container. After a few weeks, your brew will still be good, but it will gradually lose intensity and complexity.
If you want to better understand how acidity and bitterness influence the final cup, take a look at this article: “Coffee acidity and bitterness – how to choose the perfect beans for your taste”.
📌 In short: Fresh beans, the right roast level and proper grind size are the foundation of great moka pot coffee. Even the best technique won’t help if the coffee isn’t fresh!
How to brew coffee in a moka pot – step by step
We’ve already explained how a moka pot works and which beans will work best. Now it’s time to put everything into practice. The following step‑by‑step instructions will help you avoid the most common mistakes and make your first (or next!) attempt at brewing coffee in a moka pot simple, intuitive and delicious.
This guide is perfect for beginners – you’ll find “by eye” tips, characteristic sounds and visual cues that make it easier to judge exactly how to brew coffee using a stovetop espresso maker.
Step 1: Fill the lower chamber with water
Everything starts with water. Pour water into the lower chamber up to the safety valve level – never higher. If you pour too much, the pressure inside the moka pot may become excessive and the brewing process will not work correctly.
The best choice is filtered water or boiled, cooled water. Hard water affects the flavour and may speed up limescale build‑up inside the stovetop coffee maker.
💡 Tip: Want to speed up the brewing process and avoid burning the coffee? Fill the moka pot with hot water. This reduces the time the pot spends heating on the stove.
Step 2: Fill the coffee basket
Now it’s time for the coffee. Fill the basket evenly, right up to the rim, ensuring there are no empty spaces – this guarantees even water flow. Important: do not tamp the coffee. In a moka pot, the grounds should sit loosely, unlike espresso, where a compact puck is required.
It’s best to adjust the amount of coffee to your moka pot’s capacity. Labels such as 1‑cup, 3‑cup or 6‑cup indicate how many small “Italian‑style” servings the pot will brew – for example, a 3‑cup stovetop espresso maker will produce about three 40–50 ml servings. For proper extraction, the basket should always be filled to the top, as designed. Too much or too little coffee can disrupt water flow and affect flavour.
Step 3: Assemble the moka pot and place it on the stove
Once the basket is full, place it in the lower chamber and screw the moka pot together firmly. Make sure the threads are clean and dry – this prevents leaks and hot coffee spraying out. Place the pot on a burner that matches its base size, and use medium or medium‑low heat. A flame that is too strong can scorch the coffee and cause a violent, uneven extraction.
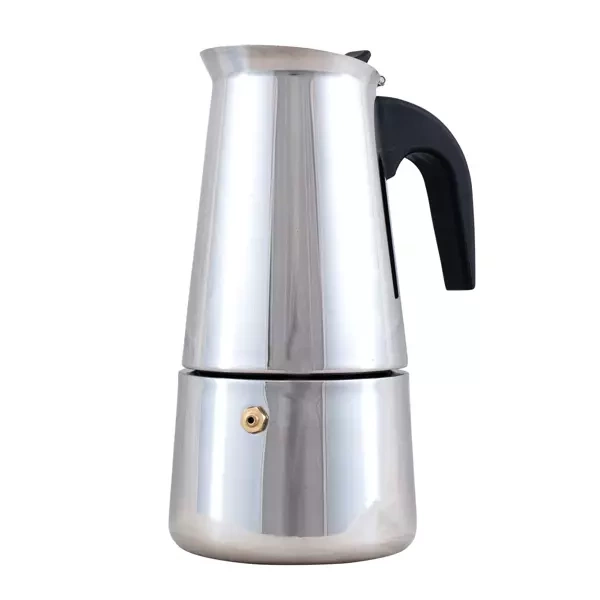
You can use a moka pot on most common types of stoves. On a gas stove or a ceramic/electric stove, both aluminium and stainless steel models work well. If you have an induction hob, ensure your stovetop coffee maker is made from induction‑compatible stainless steel – classic aluminium moka pots will not work without a special induction adapter.
| Type of stove | Aluminium moka pot | Stainless steel moka pot |
|---|---|---|
| Gas stove | ✔️ Yes | ✔️ Yes |
| Ceramic / electric stove | ✔️ Yes | ✔️ Yes |
| Induction hob | ❌ No (unless using an adapter) | ✔️ Yes |
💡 Tip for beginners: The flame or heat source should only warm the bottom of the moka pot. On a gas stove, make sure the flame doesn’t go beyond the edge of the pot – this protects the handle and prevents overheating.
Step 4: Watch the brewing process
Keep the lid open so you can observe the process. After a moment, you’ll hear a gentle hissing, and the first dark, concentrated drops of coffee will appear from the top spout. This is normal and represents the strongest part of the extraction.
If the coffee starts flowing too fast or becomes very loud, lower the heat. The ideal process should be smooth and steady, without violent bubbling.
How to recognise the perfect moment to finish brewing?
It’s easier than it seems. The ideal moment is when:
- the coffee stream becomes lighter in colour and slightly foamy,
- the characteristic “gurgling” sound begins to fade,
- the last coffee emerges slowly and quietly.
At this stage, remove the moka pot from the heat to avoid burning or over‑extracting the coffee. How long does brewing coffee in a moka pot take? Typically, the whole process takes about 3 to 5 minutes – the calmer and more even the flow, the better the taste.
Step 5: Remove from heat and stir the brew
Once brewing is complete, carefully take the moka pot off the stove. Before pouring, gently stir the coffee in the upper chamber with a spoon. Why? Because the first drops are the strongest, while the final ones are milder – stirring creates a more balanced cup.
It’s best not to leave coffee sitting in the moka pot for long – the metal heats up and may cause a bitter aftertaste. Pour it immediately.
📌 Coffee from a moka pot – quick summary:
- Fill the lower chamber with water – up to the safety valve.
- Fill the basket with coffee to the top, without tamping.
- Assemble the moka pot and place it on low or medium heat.
- Watch the flow – the first drops will be the darkest.
- Remove from heat once the stream lightens in colour.
- Stir the coffee in the upper chamber and serve immediately.
The most common mistakes when brewing coffee in a moka pot
Even though a moka pot seems incredibly easy to use, there are several common mistakes that can spoil the taste of your coffee, even if you’re using high‑quality beans. Fortunately, most of these issues are easy to avoid – all you need is an understanding of the basic rules of brewing and a few small details that make a big difference to flavour.
Too high heat and overheating the coffee
This is one of the most common causes of burnt, bitter coffee. A burner that’s too large or too powerful can cause the water to boil too violently, overheating the grounds. A moka pot should brew steadily and calmly – without loud bubbling or hissing right from the start.
To prevent this, use medium or medium‑low heat. If you notice the coffee flowing too quickly or too loudly, simply lower the heat. This will make the brew more balanced and prevent bitterness.
🔎 Worth knowing: Excessive heat doesn’t just burn the coffee – it may also shorten the lifespan of the rubber gasket in your moka pot.
Tamping the coffee – why is it a mistake?
Unlike espresso, you should never tamp coffee in a moka pot. Pressing the grounds down restricts the flow of steam and water, forcing the stovetop espresso maker to work under excessive pressure. This leads to over‑extraction and a sharp, unpleasant bitterness.
Instead of tamping, lightly level the surface of the grounds so the basket is evenly filled. This ensures proper flow and consistent brewing.
Pouring water above the safety valve
The safety valve is a crucial part of every moka pot – it protects the device from excessive internal pressure during heating. If water is poured above the valve, it may no longer function properly, which is dangerous and disrupts the brewing process.
Filling the water above the valve can lead to:
- increased internal pressure,
- leaks or loss of seal,
- an unstable brewing flow, causing poor taste.
Always fill your moka pot exactly to the level of the safety valve – never higher.
⚠️ Safety above all: Never cover or block the safety valve of your moka pot. It is an essential component that prevents dangerous pressure build‑up – disabling it may be hazardous!
Neglecting to clean the moka pot
A moka pot requires regular care. Leftover coffee oils, residues and grounds accumulate on the walls and in the filter, which over time negatively affects the flavour – making it bitter, metallic or earthy. Moreover, poor cleaning shortens the lifespan of your stovetop coffee maker.
To avoid this, wash your moka pot after every use. Ideally, clean it with warm water only, without detergents, as these can leave an unpleasant aftertaste. Make sure to dry all parts thoroughly and check the gasket regularly – it may need to be replaced.
How to care for your moka pot?
A well‑maintained moka pot guarantees not only a longer lifespan of the device but also better‑tasting coffee. Regular cleaning, gasket checks and proper storage ensure your stovetop coffee maker works as intended and doesn’t give your brew a metallic or bitter flavour. Below are some practical rules to help you enjoy perfect moka pot coffee for years.
Cleaning the moka pot after every use
After each brew, disassemble the moka pot into all its components and wash them with warm water. Avoid using detergents – they can penetrate aluminium or steel surfaces and later transfer unwanted flavours into your coffee. This is especially important with aluminium moka pots.
After washing, thoroughly dry all parts to prevent build‑up of residue or unpleasant smells. Pay particular attention to the filter basket and rubber gasket – these areas often trap leftover coffee grounds.
💡 Tip: If you notice fine residue stuck in the basket after several uses, gently scrub it with a soft brush. It improves water flow and enhances flavour.
Replacing gaskets and maintaining the moka pot
The gasket and filter plate are the components most exposed to wear. It’s worth checking them regularly – ideally every few months, or more often if you use your moka pot daily. A hardened, cracked or deformed gasket can cause leaks and disrupt proper brewing.
The good news? These parts are easy to replace. Simply remove the old gasket, clean the slot and insert a new one. Proper sealing ensures steady water flow and therefore better coffee extraction. It’s also a good idea to occasionally unscrew the safety valve (if the design allows it) and remove any trapped residue.
💡 Tip: If you notice steam escaping from the seam between the chambers during brewing, it’s a sign that the gasket needs replacing.
Storing the moka pot – how to avoid corrosion and residue?
To keep your moka pot fresh and free from unpleasant odours, store it disassembled. This prevents moisture from being trapped inside, which could cause corrosion (especially in aluminium models) or create residue build‑up.
Remember that hard water contributes to limescale. If you notice white deposits on the inner walls, soak the components in a mild solution of water with a little baking soda or citric acid. After this treatment, rinse thoroughly with clean water.
Store your moka pot in a dry place with the thread slightly loosened – this allows airflow and prevents the device from absorbing odours from its surroundings.
Key rules for brewing great coffee in a moka pot
Brewing coffee in a moka pot is simple, as long as you remember a few essential rules. Choose quality, freshly roasted beans, grind them just before brewing, and match the grind size to your stovetop coffee maker. Make sure the water in the lower chamber reaches only the level of the safety valve, and fill the basket to the brim without tamping. Brew slowly – on low or medium heat – and remove the moka pot from the stove once the coffee stream begins to lighten. Regular cleaning and checking the gasket will help you maintain excellent flavour for years.
Many people also ask how to choose a moka pot that matches their needs – the key factors include capacity, material, and stove compatibility. If you are just building your home coffee set, here are our recommendations:
- ✔️ The iconic Bialetti Moka Express 1‑cup – an Italian classic producing rich, intense stovetop coffee.
- ✔️ Bialetti New Brikka 4‑cup – perfect if you dream of silky crema, thanks to an enhanced pressure valve and silicone membrane.
- ✔️ Cebador 300 ml moka pot – an affordable, reliable solution for anyone who wants to start brewing coffee in a moka pot without a big investment.
Now that you’ve learned all the key rules – from choosing beans, through the technique of how to brew coffee in a moka pot, to caring for the device – there’s only one thing left: try preparing your own aromatic stovetop coffee at home.
Let your favourite coffee taste even better – the right moka pot turns your daily cup into a small ritual of pleasure!
FAQ – frequently asked questions about brewing coffee in a moka pot
1. Can I wash a moka pot in the dishwasher?
We do not recommend washing a moka pot in the dishwasher. High temperatures and detergents can damage aluminium and the gasket, and they may also leave a chemical aftertaste. The best method is to wash it by hand, using warm water only – without strong detergents.
2. How long does brewing coffee in a moka pot take?
The entire brewing process usually takes about 3–5 minutes. If you are wondering how long does coffee brew in a moka pot, remember that the key is a calm, even extraction – if you hear aggressive bubbling, the heat is too high.
3. How to choose a moka pot?
When choosing a moka pot, consider its capacity (e.g., 1‑cup, 3‑cup, 6‑cup), the type of stove you use (gas, ceramic, induction), and the material. If you want more guidance on how to choose a moka pot, scroll up to the section with our recommendations.
4. Can I brew less coffee than the moka pot’s capacity?
No. A moka pot is designed to work with a full basket of coffee. Brewing with half the amount can disturb the extraction process. If you want to make smaller portions, choose a smaller moka pot.
5. Why is no coffee coming out of my moka pot?
The most common reasons are: too fine a grind, a clogged filter or safety valve, a worn‑out gasket, or too low heat. Also make sure you have poured water into the lower chamber and that you did not exceed the safety valve level.
6. Does a moka pot work on an induction hob?
It depends on the material. Aluminium moka pots do not work on induction hobs because the metal is not magnetically responsive. To brew coffee on induction, choose a stainless‑steel moka pot marked as induction‑compatible or use an induction adapter.
7. Can I add milk to a moka pot?
Adding milk to a moka pot is not recommended. Milk scorches quickly, which can damage the device, clog the safety valve, and produce an unpleasant smell. If you want milk‑based coffee, brew coffee in the moka pot using water only, and heat or froth the milk separately.
Recommended
Moka coffee pot 300ml
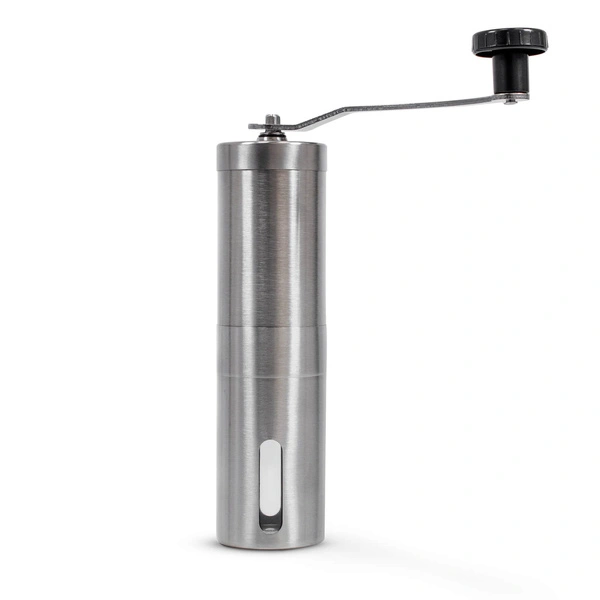
Hand coffee grinder

Moka Coffee Pot – Bialetti New Brikka 4tz